Bitfocus Companion is an awesome way to make buttons on a keyboard device control other software or hardware. My interest in this is because we run church services with very minimal staff. Usually the one person on the sound desk is the same person operating ProPresenter.
We are a small church which has to setup and teardown each week, and I’ve currently got our setup down to three wheeled units to roll out, and three cables to plug in for all sound and vision. More about that and the desk I built to hold it all in the future, because right now we are doing everything from home.
Today is all about using Companion to activate a video switcher and handle running shortcuts in zoom and ProPresenter.
Basic overview
- Companion Pi installed on a Raspberry Pi 4
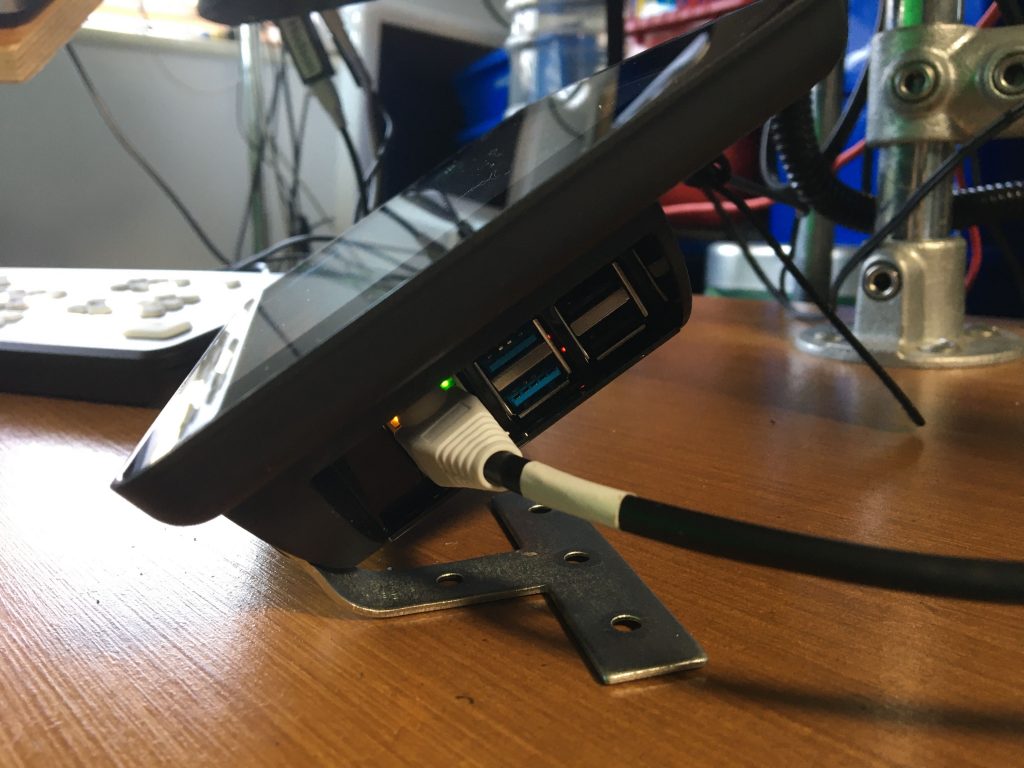
- The official Raspberry Pi touch screen
- A case to hold the pi and touch screen. Make sure you order the one for Rpi4!
- Some bent T brackets for feet
Installation steps.
I have linked to key documents were necessary. Some of these things are easy to find out with a quick google search, and they don’t have links, but the description should be enough to get you there.
- Attach all the hardware together, but don’t put it in the case yet.
- I used a separate power supply for the pi and touch screen.
- Write the Companion Pi image to a micro SD card.
- Insert the SD card and boot it all up.
- Then used
sudo raspi-configto Change timezone back to Europe/London (clearly this is an optional step, but I do like my time to show correctly on my companion buttons!!) - Added the following to the
/boot/config.txtfilelcd_display=2This will rotate the touch screen display 180 degrees so that it is oriented correctly for the case. - Then installed
chromium-browserand set it to run in kiosk mode. I followed the excellent instructions from desertbot.io, but my first step in those instructions was already completed as I had the companion pi image installed and running. - For your Kiosk URL use
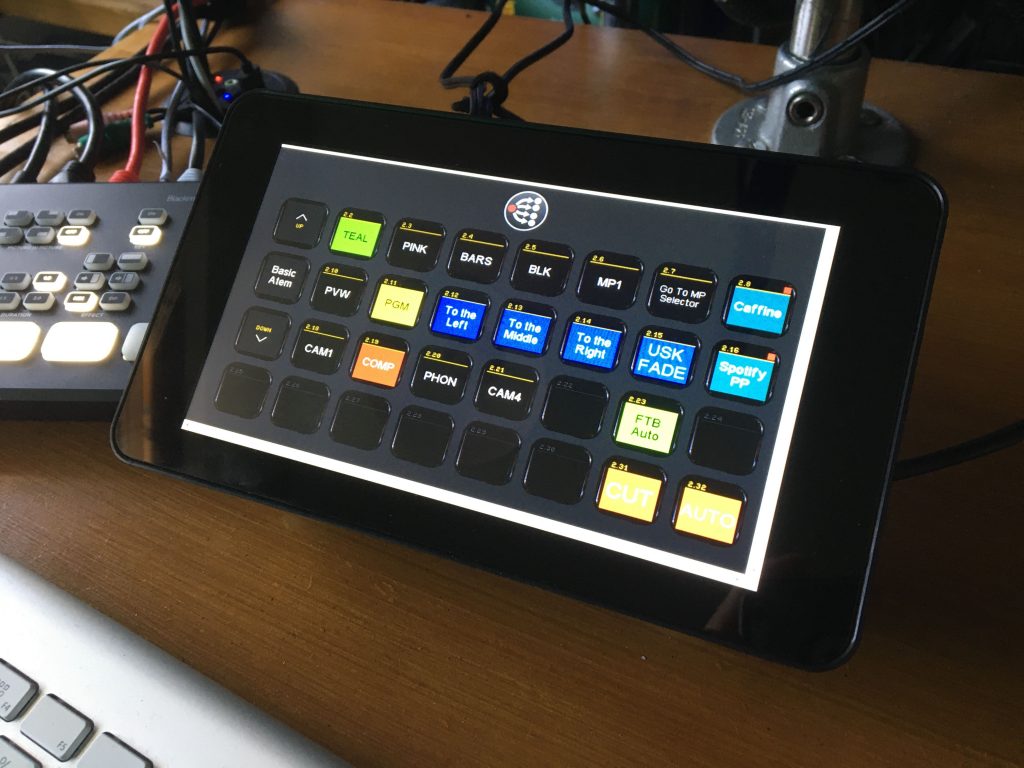
http://localhost:8000/emulatorand this will launch the emulator every time the ‘kiosk’ launches. - And that’s it, you should have the touch screen ready to use with the companion 32 button emulator.
- Finally I made some little feet to hold the screen at the right angle. Some T brackets bent to the right angle did the job here, and a couple of found screws that happened to be the right size to fit the holes in the case.
Things to to
- Screen size. the emulator page is just a little to wide and long for my liking, as this causes scroll bars to be visible. I can’t seem to find a way to get rid of these without altering the emulator page code in companion pi, and I didn’t want to go faffing with the companion code.
- Update: I’m currently using this command line after some helpful comments and emails from others who have had a go building a similar box.
chromium-browser --noerrdialogs --disable-infobars --kiosk $KIOSK_URL --force-device-scale-factor=0.88 --enable-features=OverlayScrollbar,OverlayScrollbarFlashAfterAnyScrollUpdate,OverlayScrollbarFlashWhenMouseEnter
- Update: I’m currently using this command line after some helpful comments and emails from others who have had a go building a similar box.
- Boot up seems patchy, sometimes it’s fine and sometimes I get a flashing activity light on the pi which sugests that it couldn’t read a file from the SD card. I suspect the SD card is flaky, so might try another one, but don’t have one spare at the moment…
- A new faster SD card did the trick.
Hello,
Hello, have you found a solution for the size of the Companion emulator?
See my comment below 🙂
Nice article, it brought together a number of things I was looking at, so it was great to have it all in one place.
To get the emulator to fit better in the screen you should try adding –force-device-scale-factor=0.79
to the chromium-browser command in /etc/xdg/openbox/autostart You may need to fiddle with the number. 0.77 looks pretty good on my 5 inch screen.
–enable-features=OverlayScrollbar seems to get rid of the scrollbar visibility (actually it hides it – it is still there!)
Cheers